
HowTo - Windows - Export certificate (pfx)

Author
John Billekens
Technical Consultant | End User Computing

group: “Windows”

Certificates are an important part of a modern environment. They make communication safer by encrypting the traffic between the client and server. A safe way to move certificates between servers or store them safely is by exporting the certificate (private and public key) to an encrypted format. A commonly used format is “pfx” (Personal Information Exchange also known as PKCS#12). A pfx file can contain one or more certificates and is encrypted with a password. Without the correct password the pfx is useless. You commonly see that a pfx contains a (web) server certificate and one or more intermediate certificate(s) and a root certificate.

A Windows machine has two certificate stores

  • Machine store
    Can be accessed by opening “certlm.msc”
  • User store
    Can be accessed by opening “certmgr.msc”

For this example we are opening the machine store, there my private and public key is located. 

Click on the start menu or press windows key + r and run “certlm.msc”

Run certlm.msc

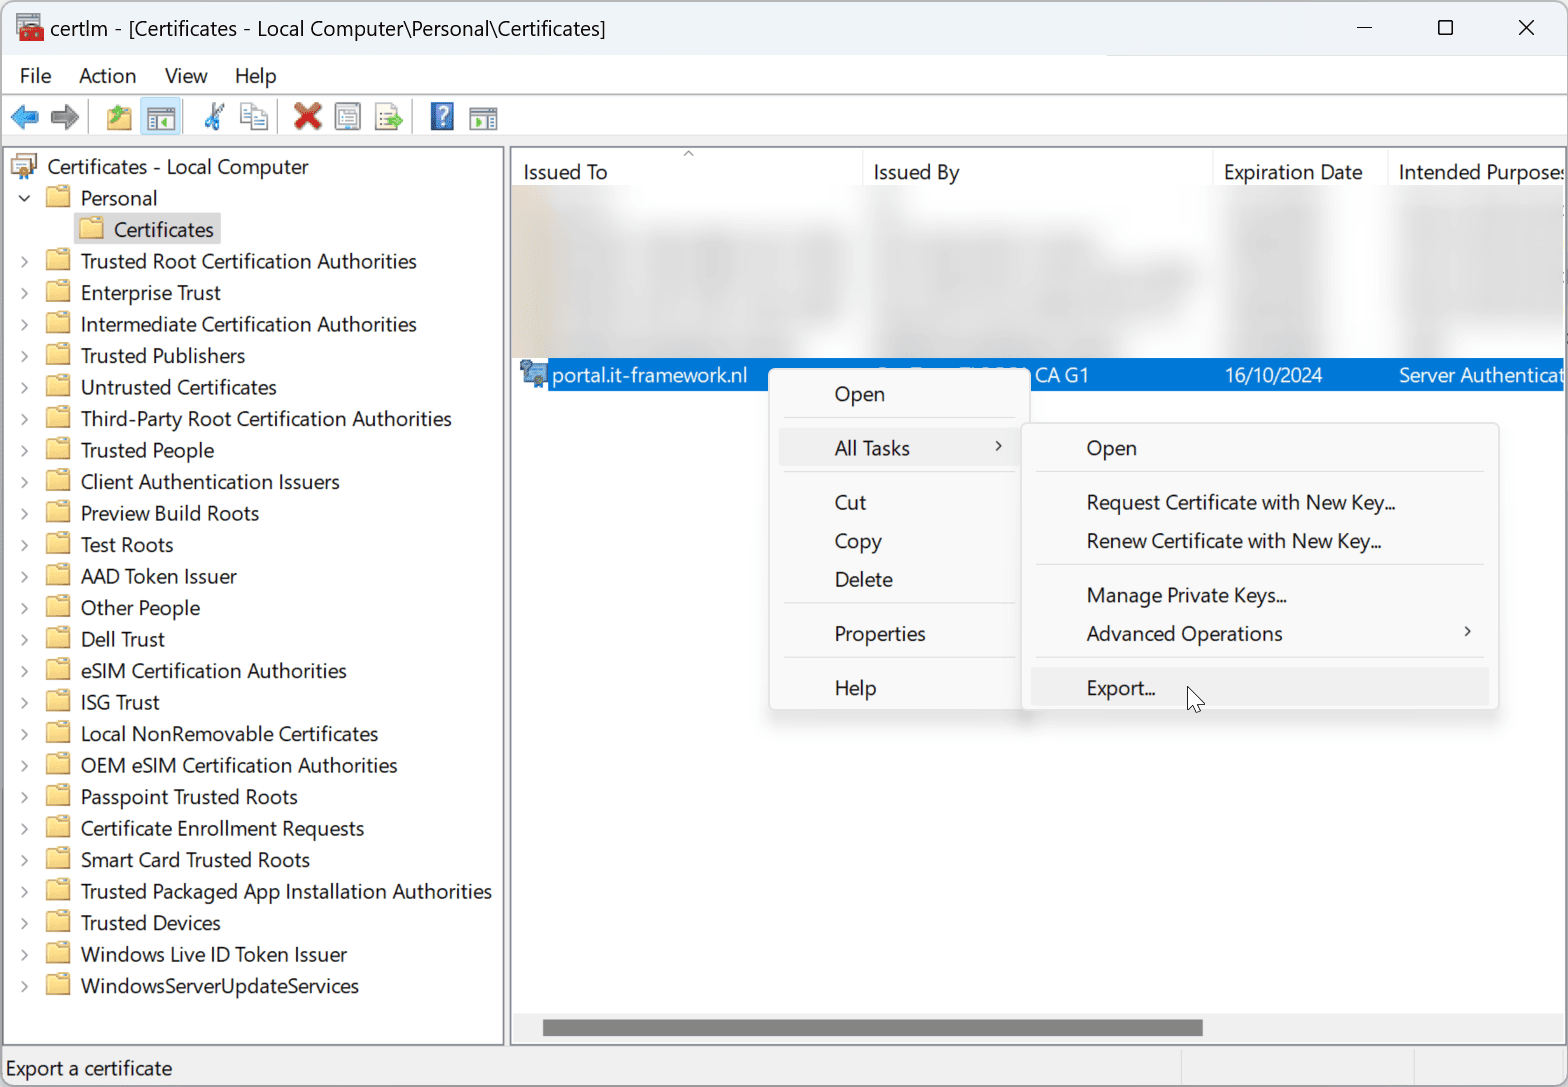
Next, open the folders “Personal” and “Certificates”.

NOTE: Make sure the certificates has a matching private key! You can easily verify it by looking at the icon in front of the certificate. If a key symbol is visible at the left upper corner of the certificate a matching private key is present.

Select the certificate you want to export. 

Export certificate

In the “Welcome to the Certificate Export Wizard” window, click “Next”.

Certificate export introduction

Make sure “Yes, export the private key” is selected before you click “Next”.

NOTE: It might be that you cannot select this option and that it is greyed out. This means that the private key cannot be exported. When the certificate was created or imported the option to export the private key must have been selected. Without that option you cannot export the certificate and continue this procedure.

Export with private key

By default the options “include all certificates in the certification path if possible” (this includes the intermediate certificates and root certificate if present) and “enable certificate privacy” (If enabled all certificates are encrypted if disabled only the private key is encrypted) are selected. You can leave them on if you want to move these from one Windows server to another. But if you want to use the exported pfx file on a NetScaler I like to disable these options. And additionally I select the option “Export all extended properties”.

Select only cert without int and root

Make sure you select the checkmark before “Password” and enter a secure password before clicking on “Next”.

Enter password

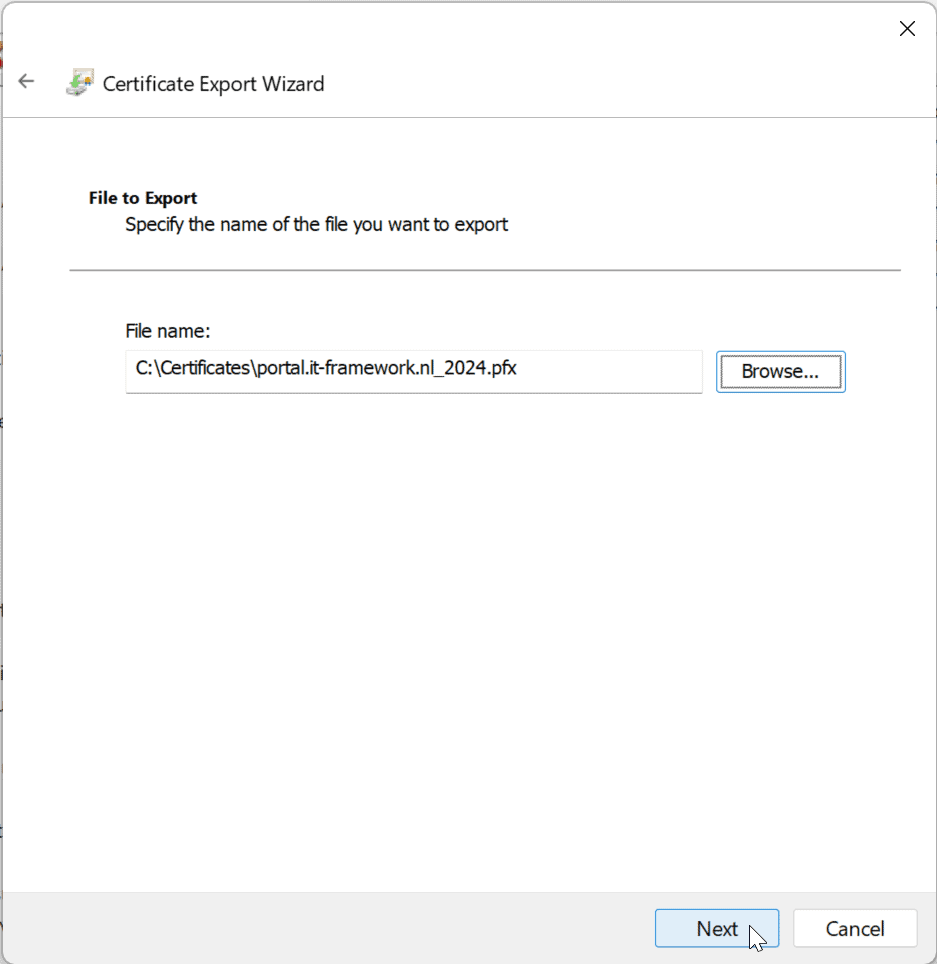
Enter a path and name where you want to store the pfx-file. I like to use the “Common Name” as name for the certificate and append the date (formatted as “_MMYYYY”) or year (formatted as “_YYYY”) at the end. This way I easily can see when the certificates are expired and cleanup those files. 

Specify a name

Click “Finish” on the final wizard page to finalize the export.

Certificate export overview

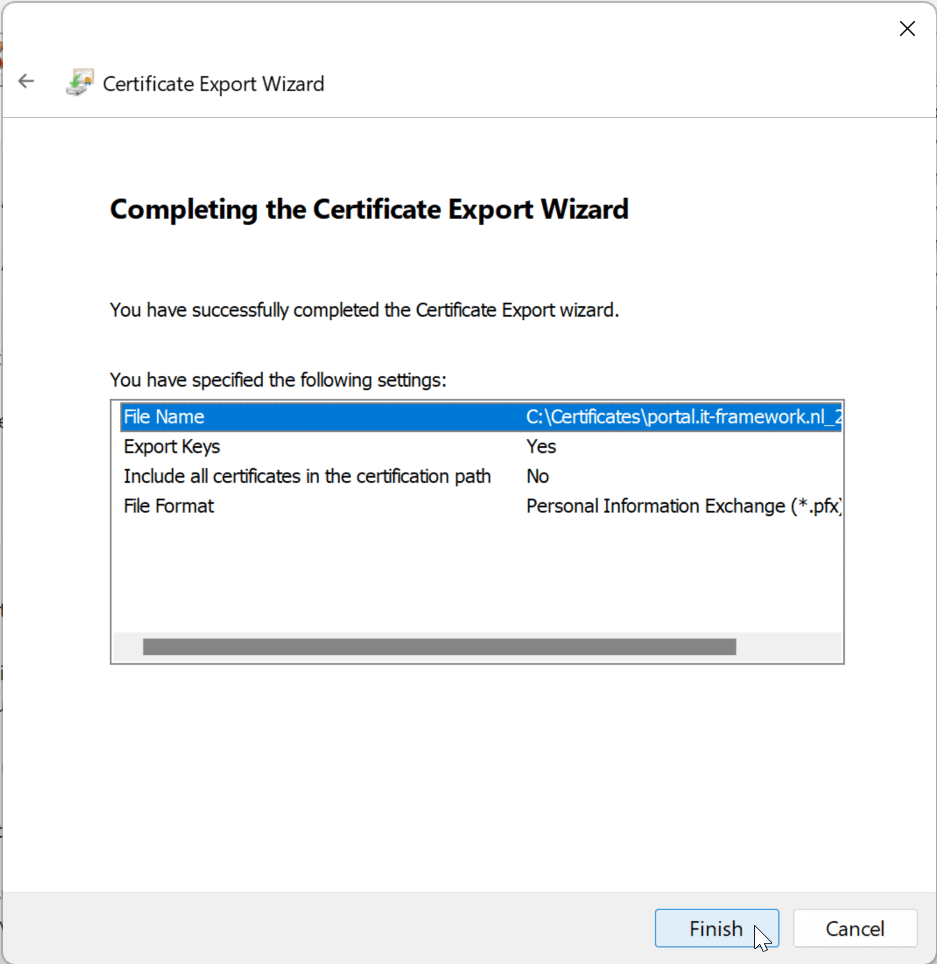
When all goes well you are presented with a “The export was successful” dialog box.

Certificate export finished

You can now safely transfer or store your certificate!


Related

Manipulate the 'NameID' SAML content - part 1

·8 mins
Some companies want to allow other (guest) companies to connect to their environment and for example allow them to open a Citrix Desktop. This can be achieved by Connecting an existing Citrix environment to the guest company via SAML (and yes there are other possibilities). SAML is an authentication method based on a two-way trust. Two Microsoft products that can offer SAML authentication are ADFS (Active Directory Federation Services, an on-premises solution) and the other is and Enterprise App you can configure from the Azure portal. The other requirement is Citrix FAS (Federated Authentication Services). In this article I will show you a way to connect a guest (company) via SAML to allow them access to your Citrix environment without the need for adding the guest companies suffix to your domain. 

Manage Native OTP tokens via Windows

·3 mins
Today I want to release an early (beta) version of a new tool I created, “OTP4ADC” With this tool you can add, remove or change the native OTP tokens used within your Citrix ADC, previously called NetScaler. 

Office Online apparently only supports TLS 1.0

·2 mins
Recently I had to configure a new NetScaler Citrix ADC for a new ShareFile Citrix Files deployment. Two Storage Zone Controllers load balanced via a Citrix ADC with a Content switch. Nothing out of the ordinary. It was when I activated the Office Online functionality on the Storage Zone Controller configuration page the error messages appeared. Each time as we tried to open an office document we got an error “Sorry, there was a problem and we can’t open this document. If this happens again, try opening the document in Microsoft Word.” for Word documents and “We couldn’t find the file you wanted. It’s possible the file was renamed, moved or deleted.” for Excel documents. I followed all the necessary checks as described in a Citrix Files Article. But everything turned out okay, it worked as expected. What could it be? As it turned out to be the NetScaler SSL configuration was configured to high!? I always want that A+ on SSL Labs, the same with this setup. It was when I reverted the Content Switch to it’s default SSL parameters (TLS1.0 and the default Cipher suite) that Office Online started functioning. It could not retrieve the documents from the Storage Zone Controllers and thus it gave me this error messages. Luckily I had a separate Content Switch for internal and external traffic. I only had to lower the SSL settings on the internal Content Switch, this is the Content Switch the Office Online server was communicating with. So I hope Microsoft will add support for TLS 1.2 in Office Online (and give it some updates)