In this how-to article I will explain the procedure how to update a certificate on a Citrix NetScaler. If you wait until a certificate is expired wil cause a lot of issues for your users or visitors. By being on time with the renewal will save you a lot of trouble.
This article assumes you already renewed the certificate and have a pfx (without the root and intermediate) with matching password available.
You can also follow this article to export a certificate with private key to a pfx file.
If you want to install a certificate on the NetScaler you can follow this guide.
Updating an existing certificate is preferred over adding a new certificate. When adding an updated certificate as new, you will have to update all the bindings for all VIP’s. You don’t have to do this when updating an existing certificate.
First login to the NetScaler with enough permissions to update/replace the certificate.

Next browse to “Traffic Management” / “SSL” / “Certificates” / “All Certificates“
Select the certificate you want to update by clicking on the 3 dots (…) in front of the certificate.
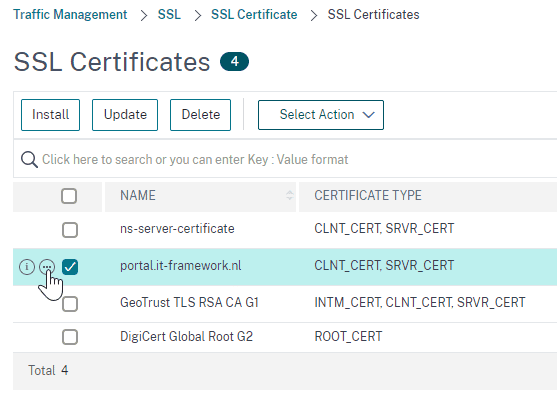
In the context menu that follows, select “Update“.

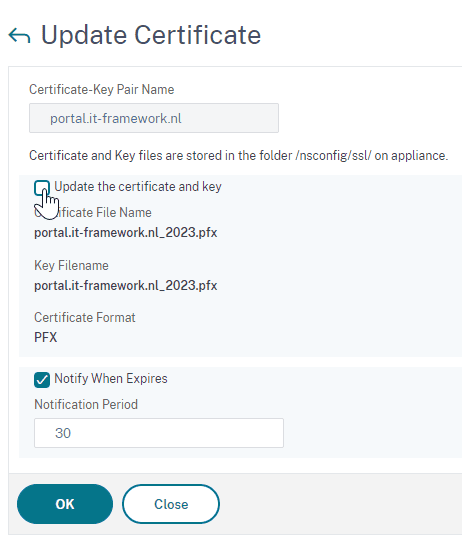
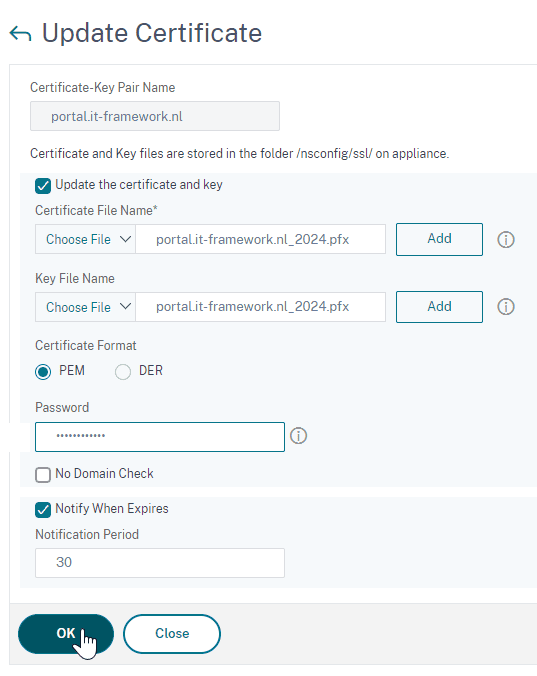
Next, check the checkbox ti “Update the certificate and key” this will enable you to change the certificate and key file.
To select the certificate, click on the down “˅” symbol and select “Local“.
An open dialog box will appear and you can select the new pfx-file.

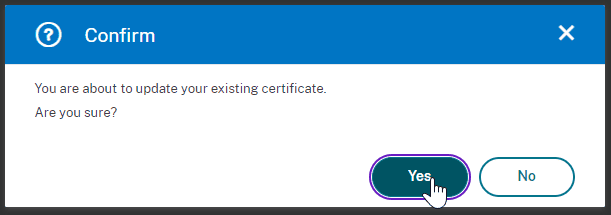
Click “Yes” on the “Confirm” dialog prompt that appears.
Make sure you also change the “Key File Name” by selecting the new pfx file.
And don’t forget to change/update the password for the new pfx file.
Click “OK” if you made all the necessary changes.
NOTE: It’s best practice to use unique and long (generated) passwords for your pfx-files.
If all goes well, the certificate will be updated without any error’s.
It can be that you will be shown a message that the link is or will be broken. In the next steps we will validate and update the link if required.
Click the “Link” button to update/validate the link.
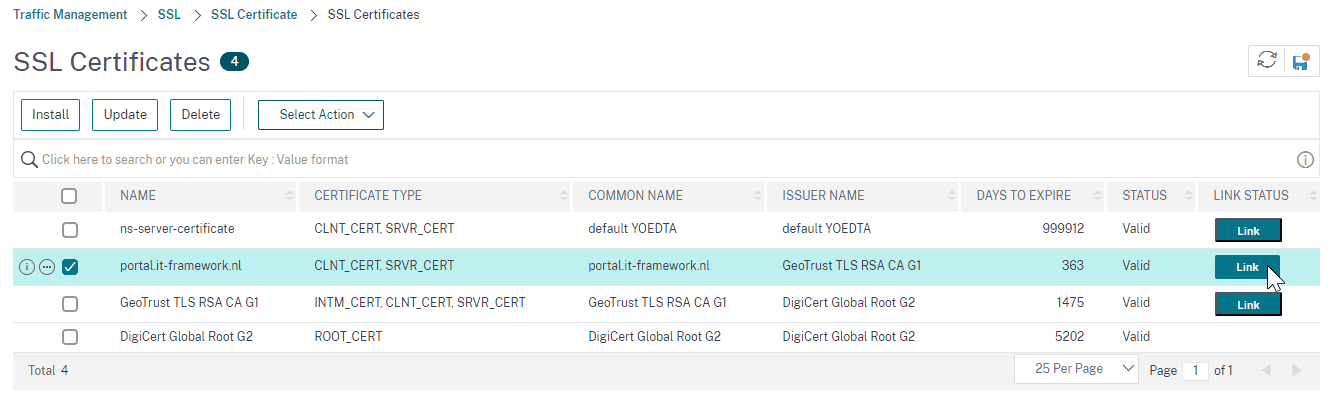
You will see all intermediate and root certificates if they are installed.
It might be that the new certificate requires an updated intermediate or root certificate. You can follow this guide to add the new certificate(s).
Click the “Link Certificates” button to complete the links.
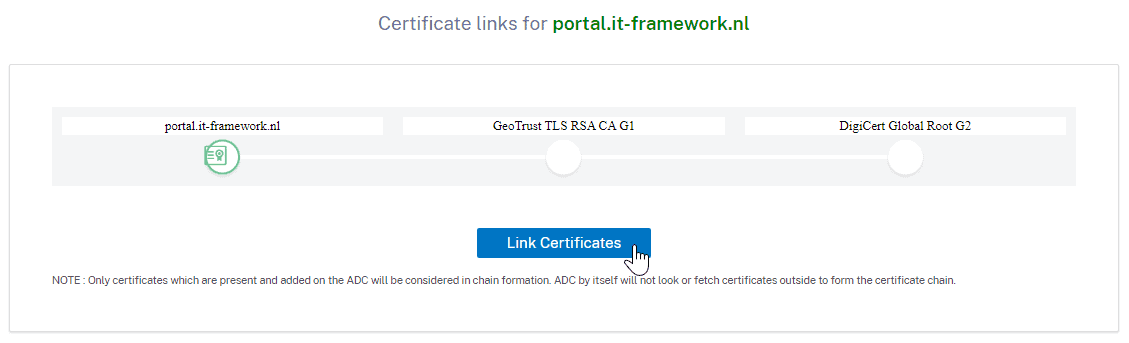
When all goes well, you will see a full (green) line with certificate symbols under the intermediate and root certificate(s).

And that’s it, the certificate is updated.
The next time the user initiates a new SSL session the new certificate will be used.
NOTE: If you have a pre-existing session to the webpage and you refresh (F5) the webpage. You might be presented with the previous (old) certificate. Just open an in-private browser session and start a new session to validate the new certificate.